Friday, April 13, 2012

Setting Up a Home Network

There comes a time in every technologically inclined media fiend's life when they realize connecting and disconnecting their laptop to and from their TV just isn't going to cut it anymore. That time came for me a little over a year ago when I decided to set up a home network with a central media storage unit. This way when I wanted to watch Netflix or Hulu or anything else online or downloaded on my TV, all I had to do at any given moment was switch the input. If you find yourself craving that ease of access as well, here's all you need to set up your own home network.

Your probably already have a TV in mind, so I won't get too wrapped up in explaining why it's important to have one of those... As for the Home Theater PC, make sure you read my post on how to set one of those up for the absolute easiest access to your downloaded and streaming media. Once you have your TV and HTPC set up, you're ready to start setting up your home network.


Wireless N Router That Won't Crap Out On You

I cannot stress this enough. When buying components for your home network, do NOT skimp on the router. The better the router, the stronger the signal will be and the fewer times you'll have to get off your couch and unplug the sucker to get everything back up and running again. I have had many routers throughout my life as an IT professional and they have all had issues to one degree or another. For me the most consistent brand with the fewest problems has always been Cisco/Linksys. While they may be a bit more expensive than the competition, you'll be wishing you had their reliability when the D-Link router set up in your attic decides to have an aneurysm while you're trying to watch the series finale of The Walking Dead in your basement. Which brings me to my next point... Setting up the router.

The actual installation of the router is simple. Plug the power cord into a surge protector, plug your cable modem into any one of the ports on the router, and plug your HTPC directly into any of the remaining ports. Generally speaking, that's all it takes. If you wish to set up the wireless functionality (and you will), please see your router's manual. Obviously a wired connection will always be faster than a wireless one, so if at all possible try to have your main HTPC directly connected to your router instead of grabbing a wireless signal.


A Reliable NAS and 2 Hard Drives

If you're like me, you probably have an obscene amount of music and videos downloaded on your laptop. The problem with having that data stored on your laptop is that it's (likely) only on your laptop. If one of your family members wants to watch a movie you downloaded they either have to borrow your laptop or take the time to copy the file to their hard drive. Having a Network Attached Storage (NAS) device solves this problem. A NAS is basically a mini computer that sits on your network and stores all of your files. Setting it up usually consists of plugging it into an outlet, attaching it to your router with an Ethernet cord, and logging into it directly from another computer on your network to set everything up. Much like with a wireless router, the NAS is another component you don't want to be stingy with. You don't want it to randomly disconnect from your network, require reboots every other day, or have communication errors with its hard drives... So spend the extra money and get one that you can take a true "set it and forget it" approach to. Which reminds me... hard driveS!

A minimum of two hard drives are required if you don't want to lose your data. Hard drives are just like life. They're guaranteed to die. If you only have one copy of your files on a single hard drive you're guaranteed to lose it at some point. The nice thing about this ZyXEL NAS unit is that it has space for two drives and allows for instant backup (RAID 1) so that you have your data saved on two drives at all times. If one drive dies, the other is there to pick up the slack and deliver your data. A pair of 2TB hard drives should be sufficient. Make sure the drives are either Western Digital or Seagate, as anything else just doesn't work as well.

So there you have it. Connect your TV to your HTPC using an HDMI cable. Connect your HTPC to your router using an Ethernet cable (or wirelessly). And finally, connect your NAS unit to your router with an Ethernet cable and save all your media directly to it for easy access from any computer on your home network.

Wednesday, April 4, 2012

Connect Laptop to TV Wirelessly via USB

We offer many simple cable solutions for connecting your laptop to your TV, but each one of those solutions requires a physical cable to be plugged from your TV to your laptop. Of course, that way you're able to experience the highest quality audio and video your laptop can provide on your television without breaking the bank, but some of you could care less and just hate wires! For those of you in this category, you're in luck... Thanks to this:


Warpia Wireless USB PC to TV

This handy little device provides seamless integration between your laptop and TV. Simply plug the USB adapter into your laptop, take 5 minutes to install the appropriate drivers, and attach the command station to your TV with the included HDMI cable. The unit supports wireless video streaming via HDMI, DVI, or VGA and audio connectivity through HDMI or 3.5mm mini-jack.

Currently the Warpia Wireless USB PC to TV adapter is only capable of running on Windows, but it provides resolution up to 1400x1050 pixels (almost pure 1080p, but not quite). The Warpia has a solid 20 foot range from laptop to TV, preventing you from having to purchase any extra-long cables that would otherwise be exposed throughout your living room.

Right now the Warpia is the only wireless option for connecting your laptop to your TV. So, if you're looking for a clean, reliable method of connection, you need to get the Warpia Wireless USB PC to TV adapter today.

Tuesday, April 3, 2012

Connect Xbox 360 to TV Instead of Laptop

Chances are you're visiting this site because you want to figure out how to connect your laptop to your TV. You're likely looking for some cable or adapter that will allow you to mess with some settings on your laptop and get it to successfully connect to your television. But, what if I told you you didn't need to connect your laptop to your TV if you already have an Xbox 360? If you're just looking to stream video, music, Netflix, or Hulu from the Internet to your TV you can probably leave your laptop in its bag.


Connecting Xbox 360 to Your TV

The Xbox 360 has dropped significantly in price since its launch price of $399 back in November of 2005. Now you can purchase the basic model for around $199 and have your media connected to your TV within minutes of taking it out of the box. The Xbox 360 allows for HDMI connection (via a $5 cable) so you can connect it to your TV with 1080p crystal clarity. You can control your media with the standard Xbox 360 controller or a proprietary remote control designed by Microsoft.

To play your media on your Xbox, you'll first need to copy the videos or songs you wish to play to a USB device. The USB device must be FAT32 formatted, not NTFS. If you don't know the difference between the two, thumb drives generally will work as they are FAT32, whereas larger external hard drives will not as they are generally NTFS. This 32GB flash drive from SanDisk should work just fine.

NOTE: Make sure that your videos are converted to AVI, MPEG4, or MP4 before copying them to your USB drive. If your files are not in one of those four formats you can convert them to one using the free Videora conversion software.
  1. Once your videos are in the proper format and stored on your USB drive, plug the drive into your Xbox 360 and power it on. 
  2. Once your Xbox has booted up, scroll to the My Xbox menu and select the Video Library option.
  3. From the list of storage options, select your USB flash drive.
  4. Select the video you wish to play and hit Play.

Xbox 360 Internet Streaming Options

If you don't have many videos downloaded, have no fear. The Xbox 360 is a native supporter of Netflix (meaning it has its own Netflix software built in). All you need to sign into your Netflix account and start streaming movies in full HD is a subscription to Xbox Live.

Simply buy the Xbox Live subscription card featured on the left, create or login to your Xbox with your Xbox Live account, and launch the Netflix program on your Xbox from the Video menu on your Xbox. All of your Netflix Instant Queue titles will appear on the screen and be available to watch.

Connect Nettop to TV | Home Theater PC

One solution, and the solution that I personally use for connecting my laptop to my TV, is to get rid of my laptop all together. Instead of constantly messing with cables, changing resolutions and screen settings, and booting up my laptop all the time, I decided it was worth the investment to buy a Nettop for about $350.

A nettop (half netbook, half desktop) is a very small computer that runs silently, puts off very little heat, and uses hardly any power. They're about the size of the Nintendo Wii, so they'll fit easily in your entertainment center, and can run any media file you can run on your laptop.

At my house I have an Acer AspireRevo 1600, but they're currently discontinued. The new Acer model is the AspireRevo AR3700-U3002.

Acer AspireRevo AR3700-U3002

With a 250GB hard drive, 2GB RAM, an HDMI-out port, 6 USB ports, and an Intel ION graphics card, this device will be the last thing you ever need to connect to your TV. The AR3700 comes with Windows 7 pre-installed, so all you need to do is plug in the power cord, included mouse and keyboard, and connect it to your TV with a garden variety HDMI cable. Then just power the nettop on, use the built-in WiFi to connect to your home network, and you instantly have yourself an excellent Home Theater Personal Computer (HTPC).

Of course, there are a few things that you could consider purchasing to make your HTPC setup that much more enjoyable...


4GB SODIMM DDR3 PC3-10600

While the AR3700 comes with 2GB RAM pre-installed, you can get a lot more power out of it by simply adding more RAM. It is not recommended to mix RAM modules, as it can cause blue screens and other technical problems. If you buy this 2GB x 2 set from Crucial you can't go wrong. Installing it is simple and it is the single biggest DIY hardware improvement that will make your nettop faster.

HDMI Cable

Without an HDMI Cable it will be difficult to connect your nettop to your TV. Simply plug one end into your AspireRevo's HDMI output and the other end into your TV's HDMI input, switch your TV's input to HDMI, and your nettop is successfully connected to your TV. Of course, if your nettop or TV doesn't have an HDMI connection you can check out your other options with my easy to use form that shows what cables you need to connect your laptop to your TV.

Logitech diNovo Mini

Lastly, and probably my favorite gadget in my entire house, is the Logitech diNovo Mini. This small device featured in several episodes of 24 makes controlling your TV-connected nettop (or laptop) as easy as possible from the comfort of your couch. The diNovo mini connects to your nettop or laptop via a USB Bluetooth connection, allowing you to wirelessly control your HTPC from up to 30 feet away. It allows for control of both keyboard, mouse, and media buttons through possibly the most intuitive compact controls I've ever used.

In my experience it holds a charge for 3-4 days of regular use before needing to be plugged in. It fits perfectly in the palms of your hands and takes up a lot less space than a full-sized keyboard and mouse would in your living room. 

Thursday, March 29, 2012

Index of Ports (Inputs and Outputs)

Video

Digital Video

HDMI (Can carry both audio and video)

DVI

Analog Video

VGA (High Resolution Analog)
S-Video/RCA (Yellow) (Low Resolution Analog)
Audio

Digital Audio (Provides Surround Sound)

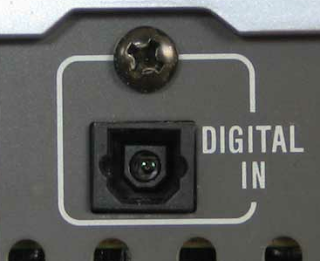
Optical
Coaxial

Analog Audio

RCA (White and Red) Stereo

3.5mm (mini-jack) Stereo

Connect VGA Laptop to S-Video/RCA TV

Your Laptop (VGA Out)
Your TV (S-Video/RCA In)

If you have both an older laptop and older TV, you probably have the input/output configuration listed above. While you will lose quality going from high-resolution VGA to low-resolution S-Video/RCA, this setup is still better than nothing. To connect your laptop's VGA output to your TV's S-Video/RCA inputs, you'll need the following items.


VGA cable

The VGA cable will carry an analog signal from your laptop's VGA OUTPUT to the VGA to S-Video/RCA converter. Any simple VGA cable will work, so if you have an extra VGA monitor cable lying around your house you can use that and save yourself a few bucks.

VGA to S-Video/RCA Converter

This VGA to S-Video/RCA converter will take your laptop's analog VGA signal and convert it into a format usable by S-Video and RCA cables. Plug your VGA cable into the converter's VGA INPUT and your S-Video and RCA Video cables into the device's OUTPUT.

S-Video Cable

While not completely necessary to connect your laptop to your computer, the S-Video cable makes your picture noticeably crisper than just connecting the converter to your TV using an RCA video cable. Plug one end into the converter's S-Video OUTPUT and the other end into your TV's S-Video INPUT to make the connection.

RCA Video Cable

The RCA Video cable takes the converted video signal from your S-Video/RCA adapter's video OUTPUT and transmits it to your TV's RCA Video INPUT. It is necessary in order for your laptop's video to be successfully transmitted to your TV.


VGA to S-Video/RCA Audio Options

There are several options for transmitting your laptop's audio to your TV's speakers, but the most reliable one in this scenario would be to use a 3.5mm to RCA Stereo Y-Splitter like the one pictured to the left. Plug the 3.5mm end of the cable into your laptop's headphone OUTPUT jack and the other end into your TV's RCA Stereo (red and white) INPUT jack and you're instantly good to go.

Connect Laptop to TV via VGA

Your Laptop (VGA Out)
Your TV (VGA In)
Do you ever feel like you're writing the same thing over and over again, just switching out a few words and trying to put a clever spin on the next iteration of the exact same instructions? Sort of like "If your laptop takes Output A and your TV takes Input B, use this cable or converter..."

No?

If your laptop has a VGA output and your TV has a VGA input, this VGA cable is all you need to connect your laptop's video to your TV screen. Also known as a "blue monitor cable," chances are if you're reading this on a desktop computer you're sitting within a few feet of one. While a VGA cable carries an analog signal, unlike its digital HDMI and DVI counterparts, it is the only (common) analog cable that can also carry a resolution comparable to a 1080i TV (1920x1080 pixels).

This particular cable comes equipped with a built-in 3.5mm audio cable that allows for a quick and easy method of connecting your laptop's audio to your TV's speakers. Next to using an HDMI cable, this single VGA/3.5mm cable is probably the easiest solution available to fully connect your laptop to your TV.

Of course, if 3.5mm audio isn't your thing, there are other options...